Category: Dairy Free

Italian Roast Beef – Paleo, Instant Pot

In my last Butcher Box shipment, I received two Bottom Round Roasts. Instantly, my husband said, “Mmmmmm…..roast beef again.”

Well, I have to confess that roast beef is just not my favorite. I realize that particular YouTube video has been my most popular by far, but it’s just not a meal I look forward to.

Enter this Italian version. My thought (and hope) was that the addition of some Italian spices, which my whole family loves, would elevate what is otherwise a pretty simple dish and turn it into something I could really enjoy.

Low and behold, it worked! I know my family would have loved this meat in a sandwich, Philly Cheesesteak style, but we just cannot do gluten free bread all that often. Plus, I’ve never seen a gluten free hoagie bun or crusty roll and that’s really what you need for this application.

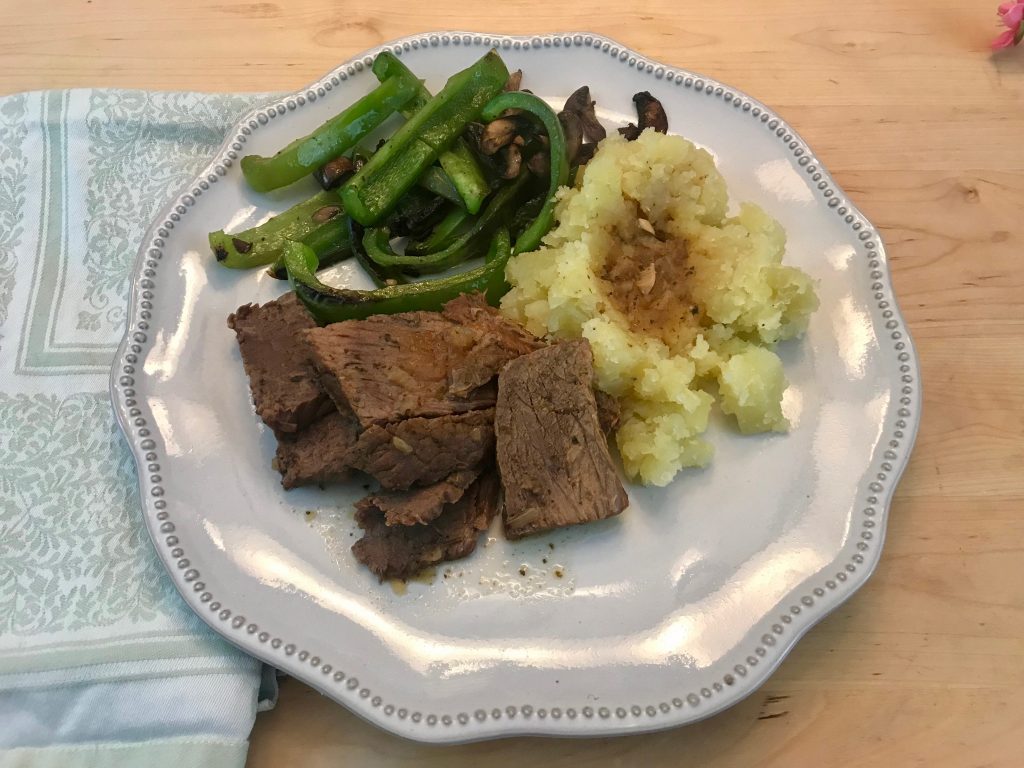
So I served their meals as a sort of deconstructed sandwich, with sautéed peppers and mushrooms on the side. And instead of bread, some simply smashed potatoes with ghee, salt and pepper.

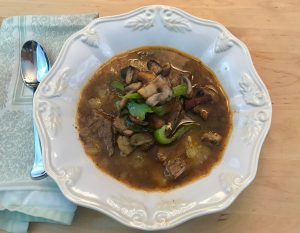
For myself, I served up all the same stuff in a bowl and ladled on lots and lots of that delicious broth. I am not one to drink a cup of bone broth for breakfast. Give me all the coffee. But I do enjoy a big bowl of hearty soup. If you asked me, that would be my recommended way to enjoy this meal, but you do what makes you and your family happy. Just make this dish. It’s a simple and flavorful use of a fairly inexpensive cut of meat. And it’s delicious. This is definitely something I will look forward to enjoying again and again!

If you’d like a few more tips on preparation, see my YouTube video here. One note regarding that video: I talk about how to adapt this for AIP and mention leaving out the paprika, but you would also need to leave out the pepper as both are seed-based spices and not allowed on the autoimmune protocol.
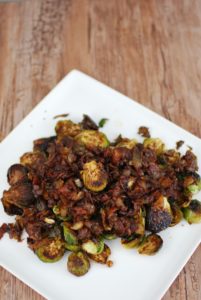
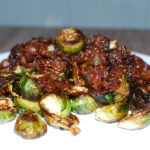
Italian Roast Beef

A slight twist on the traditional Pot Roast. Serve this up in a crusty roll for a decadent sandwich or keep it paleo with a bunch of veggies on the side!

Course Main Course
Cuisine Comfort Food, Instant Pot, Italian, Paleo
Servings 6 servings
Author Elizabeth

Ingredients

Italian Spice Blend

  • 2 tsp. dried oregano
  • 1 tsp. dried basil
  • 1 tsp. onion powder
  • 1 tsp. paprika
  • 1 tsp. black pepper
  • 1 tsp. sea salt
  • 1/2 tsp. garlic powder
  • 1/2 tsp. dried rosemary
  • 1/2 tsp. dried thyme

Roast Beef Ingredients

  • 2 Tbsp. avocado oil
  • 2-2 1/2 lb. grass-fed bottom round roast
  • 1 large sweet onion
  • 1 1/2 Tbsp. Italian Spice Blend
  • 2 cups bone broth beef or chicken or a combination

Instructions

  1. Begin by mixing all of the Italian Spice Blend ingredients in a small bowl. Set aside. 

  2. Turn Instant Pot onto Sauté, high. Add oil and swirl to coat the bottom of the pan. Slice onions and add to pan. Give it a stir. 

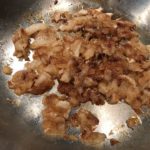
  3. While onion cooks, prepare the meat: Blot roast with a paper towel and cut into medium-sized chunks, about the size of tennis ball or a little smaller. 

  4. Coat the meat with the spices. (Store the remaining spices in an airtight container for a future use.)

  5. Once onions have begun to brown, just 4-5 minutes, remove from the pan and add the meat. Allow to sear on 2-3 sides. Now add the onion back in and pour the broth over all. 

  6. Turn Instant Pot off. Secure the lid and set to manual, high pressure for 30 minutes. 

  7. You can release the pressure if you're in a hurry or you can allow it to depressurize naturally. Either way will yield great results. 

  8. Now you have to decide how you want to eat your roast. Slice the meat thin for sandwiches or shred it and serve it up in a bowl with all that delicious broth and eat it as a soup/stew.

Cinnamon Streusel Coffee Cake

There are people who can follow a low sugar/low carb/ketogenic diet forever and ever and never have a desire for something sweet. I am not one of those people.

I feel really good when I eat very low carb – most of the time – but I still like sweets. It’s just part of who I am.

This means that I have to figure out how to make some tasty treats that are still pretty low in carbohydrates and sugar.

Some people love pie, some love cake, some love candy. I possess an equal opportunity sweet tooth. But if I were really forced to choose, I would choose cake. A light, fluffy vanilla cake with that awfully sweet white icing that you get at the grocery store – yep, I confess, that stuff is heaven on a plate. At least it used to be. I haven’t had any for years, but I do still dream about it.


So naturally, when I set out to make myself some sort of “sweet” treat, I went straight for cake. Voila! this coffee cake was born. As the name implies, this is amazing served alongside your morning cup of joe, but it’s equally good as an afternoon snack or a dessert after dinner. And no, it does not contain any actual coffee. Quite a relief to my kids!

If you’re in the mood for a treat, but need to stick with a low sugar diet, this cinnamon streusel coffee cake will hit the spot!

A request please: I’m trying out a new recipe format and I’d love your opinion. This one allows some options my previous form did not such as links to ingredients and nutrition information. Do you prefer one over the other? Would you like links to ingredients or nutrition info.? If you have an opinion on this, please leave me a comment. Thanks!

Cinnamon Streusel Coffee Cake

A light and fluffy treat fit for any time of the day! It's grain free, low carb, low sugar, ketogenic, appropriate for Trim Healthy Mama and easily adjusted for paleo. I think that makes it just about perfect!

Course Breakfast
Cuisine American
Servings 16 servings
Author Elizabeth

Ingredients

Cake

  • 1/2 cup butter or palm shortening at room temperature
  • 1/4 cup stevia/erythritol blend such as Truvia or 3/4 cup granular stevia
  • 3 large eggs
  • 2 tsp. vanilla extract
  • 3 cups fine almond flour
  • 1/4 cup plain whey protein substitute with additional 1 Tbsp. coconut flour for paleo
  • 2 tsp. baking powder
  • 1/2 tsp. baking soda
  • 2 tsp. ground cinnamon
  • 1/2 tsp. sea salt
  • 1 Tbsp. coconut flour
  • 1 cup half and half, heavy cream or full fat coconut milk

Streusel

  • 5 pitted Medjool dates
  • 1 1/2 cups nuts I prefer walnuts and/or pecans
  • 3 Tbsp. stevia/erythritol blend such as Truvia or 1/4 cup granular stevia
  • 1/4 tsp. sea salt
  • 1 Tbsp. ground cinnamon
  • 3 Tbsp. butter or lard or coconut oil for paleo

Instructions

To make the cake

  1. Grease a 9x9 baking dish with butter or coconut oil. Set aside. Preheat oven to 350 degrees. 

  2. Before you begin to make the cake, pour hot tap water into a bowl or glass and add the 5 dates. This allows them to soften so they can be chopped very finely. 

  3. Add butter to a large mixing bowl or bowl of stand up mixer. Beat until creamy. 

  4. Add stevia and blend well. 

  5. Add eggs, beating well after each one. 

  6. Add vanilla extract and combine well. 

  7. In a separate bowl, combine all dry ingredients: almond flour, whey protein, baking powder, baking soda, cinnamon, salt and coconut flour. Whisk to combine well. 

  8. Add 1/3 of dry ingredients to wet ingredients and mix well. Add 1/2 cup of milk and mix. Add another 1/3 of dry ingredients, mix, then add remaining milk, mix. Finally, add the remaining dry ingredients and mix well. 

  9. Spread half of cake batter in bottom of prepared baking pan. Set aside the rest while you make the streusel. 

To make the streusel

  1. To the bowl of a food processor (the small kind works well), add all streusel ingredients except butter. Pulse for about a minute until all nuts and dates are chopped very finely. Now add the butter and pulse a few more times to incorporate. 

Finish making the cake

  1. Place half of the streusel on top of the batter already in your baking pan. 

  2. Top with remaining batter. 

  3. Using a knife or thin spatula, swirl through the batter to mix in the streusel just a bit. 

  4. Now top with remaining streusel, distributing evenly. 

  5. Bake 28-30 minutes, or until a toothpick comes out clean. 


Brussels Sprouts with Bacon and Onion Jam

Straight away we have to get the grammar lesson over with. It is Brussels Sprouts, not Brussel Sprouts. As in, these sprouts came from Brussels, the capital of Belgium. I’m sure you all knew that, but I did not. Now on with the recipe.

I’ll be the first to admit that, if all the health factors would be equal, I would eat all of the bacon and onion jam and leave the brussels sprouts for someone else to endure, I mean enjoy. But alas, all things are not equal and it is certainly better for our bodies to eat the vegetables. So I can think of no better way to eat brussels sprouts than roasted until crisp and then covered in this amazing bacon-y goodness.

If you don’t have an Aldi grocery store near you, then pray one opens soon. There is a lot about this discount store that I don’t particularly love, but their produce selection and prices are simply amazing. Each week I go, it seems they’ve added some new delicacy to their inventory. The latest was brussels sprouts. I had only made them once before trying this recipe and that was Thanksgiving and only because my sister-in-law likes them. The things we do for family.


The idea of brussels sprouts is appealing to me. I look at them and think I would like them, but in reality, I find them very bitter. However, most vegetables can be improved tremendously by roasting them at a high temperature with some sort of yummy, healthy fat – bacon, coconut, grass fed butter – whatever you like. Brussels sprouts are improved with this treatment as well.

If you are already a fan of brussels sprouts, then you’re ahead of the game. Just make this bacon and onion jam and you will be in heaven. And if for some reason you don’t like it, please bring it to me.


Brussels Sprouts with Bacon and Onion Jam

Crispy, roasted sprouts covered in a naturally sweet, bacon jam. The absolute most delicious way to eat a vegetable!

Course Side Dish
Cuisine American
Servings 4 servings
Author Elizabeth

Ingredients

  • 2 lbs. fresh brussels sprouts
  • 1 large onion
  • 1/2 pound bacon
  • 1/2 tsp. dijon mustard omit for AIP
  • 1 tsp. honey or maple syrup optional
  • 1/2-1 tsp. sea salt
  • 1/2 tsp. black pepper

Instructions

  1. Cut bacon into approximately 1/4 inch pieces and fry until crisp. Remove from skillet and place on paper towel lined plate. Set aside. 

  2. Prepare a large, rimmed baking sheet by covering with foil or parchment paper. 

  3. Leave 2 Tbsp. bacon fat in skillet and pour remaining fat onto prepared baking sheet. If you don't have at least 1 Tbsp. bacon fat for the baking sheet, add some additional from your stash in the fridge or supplement with ghee, grass-fed butter or avocado oil. Or fry a little more bacon to get a little more fat. Then eat the extra bacon. 🙂

  4. Heat skillet with bacon fat over medium high. Cut onion into small dice, add to skillet, sprinkle with 1/4 tsp. salt and 1/4 tsp. pepper. Stir frequently until onion begins to brown. Reduce heat to low and allow onion to caramelize slowly. See recipe in notes section for tips on how to speed up this process if you don't have time to take it slow. 

  5. Once onions are almost caramelized, as in the picture above, clean and trim sprouts by removing the stem end and slicing in half. 

  6. Preheat oven to 425 and place baking sheet in oven to heat. 

  7. Once oven is hot, add sprouts to pan, cut side down, sprinkle with 1/4 tsp. salt and 1/4 tsp. pepper. Roast for 10 minutes, or until browned on bottom, but not burned. 

  8. Flip each sprout over and roast and additional 8-10 minutes, until browned all over. 

  9. Meanwhile, finish the bacon jam by whisking dijon mustard into the onions. Most onions are exceptionally sweet when prepared this way, but if yours are not, then add that touch of honey or maple syrup. Stir in reserved bacon and taste for seasoning. Add salt and or pepper, if desired. 

  10. Serve sprouts piping hot from oven, covered with the bacon and onion jam. 

Recipe Notes

My recipe for caramelized onions can be found here. Please don't rush this process. If you google caramelized onions, you will find recipes that say this can be done in anywhere from 10 minutes to several hours. I like them best when I cook them low and slow for about an hour and a half. I know that seems ridiculous, but they really are best that way. You can rush the process a bit if needed and they will still be good. 

I like to make a big batch of these caramelized onions, then store them in the refrigerator. They keep well for a couple of weeks, then I can easily add them to other recipes like meatloaf, meatballs, and soups. 


Flourless Chocolate Brownies

Paleo brownie recipes abound on the internet, as do flourless chocolate cakes. I wondered if I could combine the two. I wanted a true flourless dessert, not one full of nut flours, rice flours and lots of refined sugar.

This recipe can be paleo or primal depending on the type of fat you use. I used half butter and half coconut oil so that I could get a little butter flavor, but keep the dairy to a minimum and it turned out great. If you love coconut flavor or at least aren’t bothered by it, use all coconut and keep it paleo.

I also topped mine with some chopped up high quality milk chocolate chips, just to balance the rich chocolate flavor of the base. You could top with more mini Enjoy Life chips, some chopped nuts, flaked coconut, or nothing at all. I don’t think you could go wrong!

These are rich and fudge-y and such a treat right out of the pan or a few days later out of the refrigerator. You could even keep some in your freezer for chocolate emergencies. You never know when one of those might happen!

DSC_3511

Flourless Chocolate Brownies

A rich and chocolatey treat and free of refined sugars and flours.
Course Dessert
Cuisine American, Comfort Food
Prep Time 15 minutes
Cook Time 25 minutes
Total Time 40 minutes
Servings 16 servings

Ingredients

  • 1/2 cup coconut oil* or butter, or use half of each
  • 1 cup dark chocolate chips I recommend Enjoy Life Brand
  • 1/4 cup maple syrup
  • 1/4 cup coconut sugar
  • 3 large eggs
  • 2 tsp. vanilla extract
  • 1/4 cup cocoa powder
  • 1/2 tsp. sea salt
  • 1/4 cup additional chocolate chips, coconut flakes or nuts for topping optional

Instructions

  1. Line an 8 or 9 inch baking pan with parchment paper (you can use a round or square pan) and set aside. Preheat oven to 350 degrees.
  2. In a heavy saucepan over medium-low heat, melt coconut oil and chocolate until smooth, stirring frequently. Add maple syrup and coconut sugar and continue to stir occasionally until coconut sugar has melted, about 5 minutes.
  3. In a mixing bowl, beat eggs and vanilla with a hand mixer for one minute. Add cocoa powder and salt and beat one minute more.
  4. While still mixing with the mixer or using a whisk by hand, slowly drizzle the hot chocolate and sugar mixture into the egg mixture. SLOWLY. Once all chocolate/sugar has been incorporated, mix for one more minute.
  5. Pour chocolate mixture into prepared pan. Sprinkle with topping, if using. Bake for 22-25 minutes, until just set in the center (very slight jiggle).
  6. Remove pan to a cooling rack and allow to cool before cutting.